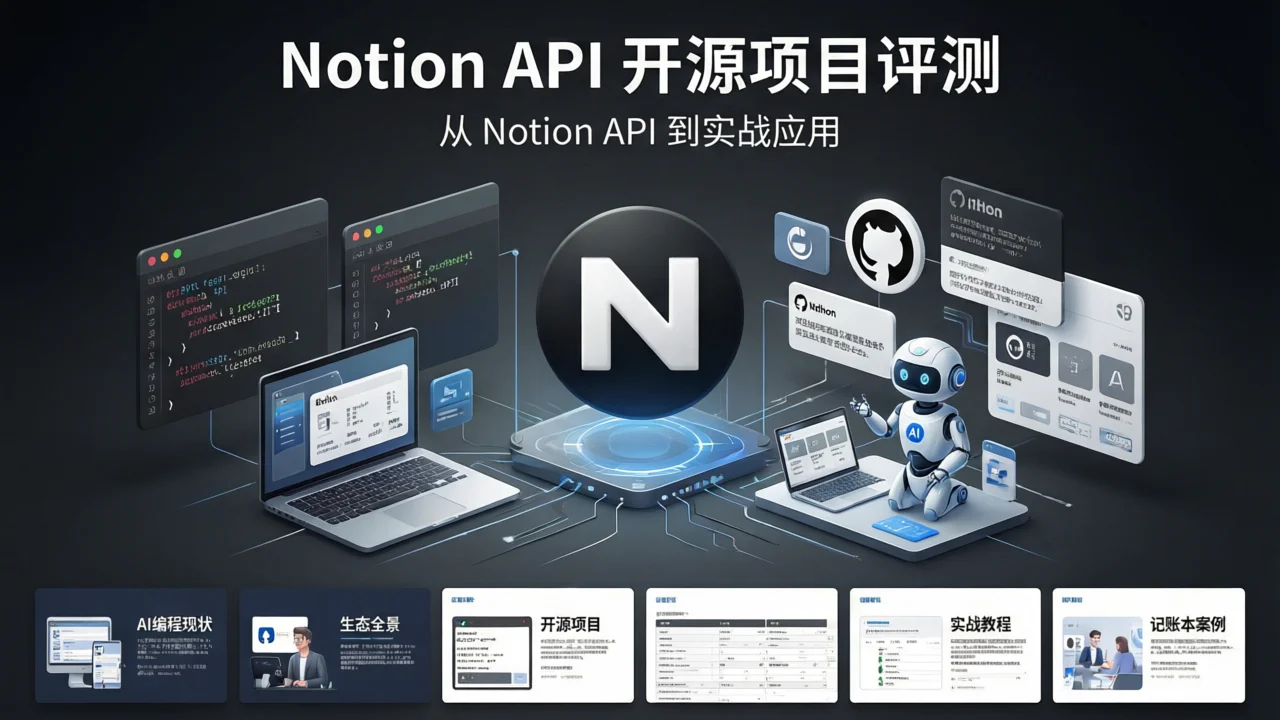
AI 編程工具深度評測:從 Notion API 開源項目到實戰應用
在 AI 編程工具飛速發展的今天,開源社區圍繞 Notion API 構建了龐大的工具生態。從官方 SDK 封裝到博客系統、內容渲染器,再到個人記帳本,這些項目讓開發者可以用最低成本搭建個人知識庫和內容管理系統。
本文將深度評測 7 值得關注的 Notion API 開源項目,並提供 Python 和 JavaScript 雙語言的實戰程式碼範例,幫你快速上手。
一、AI 編程工具現狀:為什麼選擇 Notion API?
2026 年的 AI 編程工具市場已經形成三大陣營:
- AI 代碼助手:GitHub Copilot、Cursor、Codeium 等,專注於代碼補全和生成
- AI 項目管理:Notion AI、Linear、Obsidian + AI 插件,將 AI 融入知識管理
- AI 開發框架:LangChain、LlamaIndex、Vercel AI SDK,提供底層 AI 能力封裝
Notion API 之所以成為開源項目的熱門選擇,核心原因有三:
- 結構化資料模型:Notion 的資料庫 + 頁面模型天然適合內容管理
- 開放的 REST API:官方提供完整的 API 文檔和 SDK,第三方開發者可以快速接入
- 免費額度充足:個人用戶免費,團隊版也有足夠的 API 調用配額
💡 關鍵洞察:Notion API 不是 AI 工具本身,而是 AI 編程工具的最佳”數據底座”——你可以用 Cursor 寫代碼、用 Copilot 補全邏輯,但最終的內容儲存和展示,Notion API 提供了最優雅的方案。
二、Notion API 生態全景圖
在深入具體項目之前,我們先梳理 Notion API 生態的層次結構:
┌─────────────────────────────────────────┐
│          應用層(部落格/記帳/知識庫)          │
│  NotionNext · notion2blog · notionpresso │
├─────────────────────────────────────────┤
│          渲染層(內容展示)                 │
│  react-notion-x · notion-renderer        │
├─────────────────────────────────────────┤
│          SDK 層(API 封裝)                │
│  notion-sdk-js · notion-sdk-py           │
├─────────────────────────────────────────┤
│          基礎層(Notion REST API)         │
│  https://developers.notion.com           │
└─────────────────────────────────────────┘
每一層都有對應的開源項目,開發者可以根據需求選擇合適的工具組合。
三、7 大開源項目逐一拆解
1. notion-sdk-js —— 官方 JavaScript SDK
| 屬性 | 詳情 |
|---|---|
| GitHub | makenotion/notion-sdk-js |
| Stars | 5,600+ |
| 語言 | TypeScript |
| 適用場景 | Node.js / 瀏覽器端調用 Notion API |
這是 Notion 官方維護的 JavaScript/TypeScript 客戶端,是所有 JS 生態 Notion 項目的基礎。
核心特性:
- 完整的 TypeScript 類型定義
- 支持所有 Notion API 端點
- 內置請求重試和速率限制處理
- 支持分頁查詢和增量同步
快速上手:
npm install @notionhq/clientimport { Client } from "@notionhq/client";
const notion = new Client({ auth: process.env.NOTION_TOKEN });
// 查詢資料庫
const response = await notion.databases.query({
database_id: "your-database-id",
filter: {
property: "Status",
select: { equals: "Published" }
}
});
console.log(response.results);2. notion-sdk-py —— Python SDK 社區版
| 屬性 | 詳情 |
|---|---|
| GitHub | ramnes/notion-sdk-py |
| Stars | 2,100+ |
| 語言 | Python |
| 適用場景 | Python 後端、數據分析、自動化腳本 |
儘管 Notion 官方沒有提供 Python SDK,但社區版 notion-sdk-py 已經足夠成熟,支持同步和異步兩種調用方式。
核心特性:
- 同步 + 異步雙模式(asyncio 支持)
- 完整的 API 覆蓋
- 類型提示(Type Hints)
- 活躍的社區維護
快速上手:
pip install notion-clientimport os
from notion_client import Client
notion = Client(auth=os.environ.get("NOTION_TOKEN"))
# 查詢資料庫
results = notion.databases.query(
database_id="your-database-id",
filter={
"property": "Tags",
"multi_select": {"contains": "AI"}
}
).get("results")
for page in results:
print(page["properties"]["Name"]["title"][0]["plain_text"])3. react-notion-x —— 高性能 React 渲染器
| 屬性 | 詳情 |
|---|---|
| GitHub | NotionX/react-notion-x |
| Stars | 5,400+ |
| 語言 | TypeScript |
| 適用場景 | 將 Notion 頁面渲染為 React 組件 |
這是目前最成熟的 Notion 內容渲染方案,能夠將 Notion 頁面完整渲染為 React 組件,支持代碼高亮、圖片畫廊、資料庫視圖等所有 Notion 塊類型。
核心特性:
- 精確還原 Notion 的排版樣式
- 支持暗色模式
- 懶加載優化,首屏速度快
- 支持代碼塊語法高亮(Shiki)
- 內置圖片、視頻、PDF 預覽
使用示例:
npm install react-notion-x notion-clientimport { NotionRenderer } from "react-notion-x";
import { NotionAPI } from "notion-client";
const api = new NotionAPI();
export default async function Page({ params }) {
const recordMap = await api.getPage(params.pageId);
return (
<NotionRenderer
recordMap={recordMap}
fullPage={true}
darkMode={true}
/>
);
}4. NotionNext —— 零代碼部落格系統
| 屬性 | 詳情 |
|---|---|
| GitHub | notionnext-org/NotionNext |
| Stars | 11,700+ |
| 語言 | JavaScript |
| 適用場景 | 用 Notion 作為 CMS 搭建個人部落格 |
這是 Notion API 生態中最受歡迎的”終端應用”—你只需要在 Notion 裡寫文章,NotionNext 自動將其轉化為一個完整的靜態部落格網站。
核心特性:
- 零代碼部署:Fork 倉庫 → 配置 Notion 資料庫 ID → 部署到 Vercel
- 多種主題可選(Hexo 風、WordPress 風、極簡風)
- 支持 RSS、Sitemap、SEO 優化
- 內置評論系統(Gitalk、Utterances)
- 支持自定義域名和 Analytics
部署步驟:
# 1. Fork 倉庫
git clone https://github.com/notionnext-org/NotionNext.git

# 2. 配置環境變數
cp .env.example .env.local
# 編輯 .env.local,填入 NOTION_DATABASE_ID 和 NOTION_TOKEN

# 3. 本地預覽
npm install
npm run dev

# 4. 部署到 Vercel
npx vercel --prod
5. notion-renderer —— 輕量級 React 渲染組件
| 屬性 | 詳情 |
|---|---|
| GitHub | udus122/notion-renderer |
| Stars | 200+ |
| 語言 | TypeScript |
| 適用場景 | 需要自定義樣式的 Notion 內容渲染 |
相比 react-notion-x 的”全功能”定位,notion-renderer 走的是輕量路線——它只負責將 Notion API 返回的塊數據轉換為 HTML,樣式完全由開發者控制。
適用場景:
- 已有設計系統,需要完全自定義的渲染效果
- 只需要渲染部分塊類型(如純文本 + 圖片)
- 對包體積有嚴格要求的項目
6. notion-mcp-server —— AI Agent 接入 Notion
| 屬性 | 詳情 |
|---|---|
| GitHub | makenotion/notion-mcp-server |
| Stars | 新項目(2025 年發布) |
| 語言 | TypeScript |
| 適用場景 | 讓 AI Agent(Claude、GPT)直接讀寫 Notion |
這是 Notion 官方推出的 MCP(Model Context Protocol)伺服器,讓 AI 助手可以直接操作你的 Notion 工作區。
核心特性:
- OAuth 認證,無需手動管理 API Key
- 支持 Claude Desktop、Cursor 等 AI 工具直接接入
- 讀寫雙向:AI 可以查詢頁面、創建內容、更新資料庫
配置示例(Claude Desktop):
{
  "mcpServers": {
    "notion": {
      "command": "npx",
      "args": ["-y", "@notionhq/notion-mcp-server"],
      "env": {
        "OPENAPI_MCP_HEADERS": "{\"Authorization\":\"Bearer ntn_xxx\",\"Notion-Version\":\"2022-06-28\"}"
      }
    }
  }
}
7. notion2blog / notionpresso —— 靜態站點生成器
| 屬性 | 詳情 |
|---|---|
| 代表項目 | notionpresso、notion2blog |
| 語言 | TypeScript / Python |
| 適用場景 | 將 Notion 內容導出為 Markdown / 靜態網站 |
這類工具的定位是”內容導出”——將 Notion 頁面轉換為 Markdown 檔案,然後交給 Hugo、Astro、Next.js 等靜態站點生成器處理。
典型工作流:
Notion 頁面 → notionpresso 導出 → Markdown 檔案 → Astro 構建 → 靜態網站Python 導出範例:
from notion_client import Client
import markdown

notion = Client(auth="your-token")
blocks = notion.blocks.children.list(block_id="page-id").get("results")

md_content = ""
for block in blocks:
    if block["type"] == "paragraph":
        text = block["paragraph"]["rich_text"][0]["plain_text"]
        md_content += f"{text}\n\n"
    elif block["type"] == "heading_1":
        text = block["heading_1"]["rich_text"][0]["plain_text"]
        md_content += f"# {text}\n\n"

with open("output.md", "w", encoding="utf-8") as f:
    f.write(md_content)
四、開源項目對比表
| 項目 | Stars | 語言 | 定位 | 上手難度 | 推薦場景 |
|---|---|---|---|---|---|
| notion-sdk-js | 5.6K | TypeScript | 官方 SDK | ⭐⭐ | 所有 JS 項目的基礎 |
| notion-sdk-py | 2.1K | Python | 社區 SDK | ⭐⭐ | Python 自動化腳本 |
| react-notion-x | 5.4K | TypeScript | 完整渲染器 | ⭐⭐⭐ | 需要精確還原 Notion 樣式 |
| NotionNext | 11.7K | JavaScript | 部落格系統 | ⭐ | 零代碼搭建個人部落格 |
| notion-renderer | 200+ | TypeScript | 輕量渲染 | ⭐⭐ | 自定義樣式的渲染需求 |
| notion-mcp-server | 新 | TypeScript | AI 接入 | ⭐⭐⭐ | AI Agent 操作 Notion |
| notionpresso | 新 | TypeScript | 內容導出 | ⭐⭐ | 靜態站點內容源 |
五、實戰教程:用 Notion API 構建個人知識庫
下面我們用 Python + JavaScript 雙語言實現一個完整的個人知識庫系統。
架構設計
Notion 資料庫(儲存筆記)
    ↓
API 層(查詢 + 過濾)
    ↓
渲染層(生成 HTML / Markdown)
    ↓
靜態站點(部署到 Vercel / Netlify)
步驟 1:建立 Notion 資料庫
在 Notion 中建立一個資料庫,包含以下欄位:
| 欄位名 | 類型 | 說明 |
|---|---|---|
| Title | Title | 筆記標題 |
| Tags | Multi-select | 標籤分類 |
| Status | Select | 草稿 / 已發布 |
| Date | Date | 建立日期 |
| Content | Page content | 正文內容 |
步驟 2:Python 後端——取得並處理筆記
# knowledge_base.py
import os
from notion_client import Client
from datetime import datetime

notion = Client(auth=os.environ["NOTION_TOKEN"])
DATABASE_ID = os.environ["NOTION_DATABASE_ID"]

def fetch_published_notes():
    """取得所有已發布的筆記"""
    results = notion.databases.query(
        database_id=DATABASE_ID,
        filter={"property": "Status", "select": {"equals": "Published"}},
        sorts=[{"timestamp": "created_time", "direction": "descending"}]
    ).get("results")

    notes = []
    for page in results:
        title = page["properties"]["Title"]["title"][0]["plain_text"]
        tags = [t["name"] for t in page["properties"]["Tags"]["multi_select"]]
        date = page["properties"]["Date"]["date"]["start"]

        notes.append({
            "id": page["id"],
            "title": title,
            "tags": tags,
            "date": date,
            "slug": title.lower().replace(" ", "-")
        })

    return notes

def fetch_page_content(page_id):
    """取得頁面所有塊內容"""
    blocks = notion.blocks.children.list(block_id=page_id).get("results")
    content = []

    for block in blocks:
        block_type = block["type"]
        if block_type in ["paragraph", "heading_1", "heading_2", "heading_3"]:
            text = block[block_type]["rich_text"][0]["plain_text"]
            content.append({"type": block_type, "text": text})
        elif block_type == "code":
            code = block["code"]["rich_text"][0]["plain_text"]
            language = block["code"]["language"]
            content.append({"type": "code", "text": code, "language": language})

    return content

if __name__ == "__main__":
    notes = fetch_published_notes()
    print(f"找到 {len(notes)} 篇已發布筆記")
    for note in notes:
        print(f"  - {note['title']} ({', '.join(note['tags'])})")
步驟 3:JavaScript 前端——生成靜態頁面
// generate-site.js
import { Client } from "@notionhq/client";
import fs from "fs";
import path from "path";

const notion = new Client({ auth: process.env.NOTION_TOKEN });
const DATABASE_ID = process.env.NOTION_DATABASE_ID;

async function generateSite() {
  // 1. 取得所有已發布的筆記
  const { results } = await notion.databases.query({
    database_id: DATABASE_ID,
    filter: { property: "Status", select: { equals: "Published" } }
  });

  // 2. 為每篇筆記生成 Markdown 檔案
  for (const page of results) {
    const title = page.properties.Title.title[0].plain_text;
    const slug = title.toLowerCase().replace(/\s+/g, "-");
    const date = page.properties.Date.date.start;

    // 取得頁面內容
    const blocks = await notion.blocks.children.list({
      block_id: page.id
    });

    let markdown = `---\ntitle: "${title}"\ndate: ${date}\n---\n\n`;

    for (const block of blocks.results) {
      if (block.type === "paragraph") {
        const text = block.paragraph.rich_text[0]?.plain_text || "";
        markdown += `${text}\n\n`;
      } else if (block.type === "heading_1") {
        const text = block.heading_1.rich_text[0]?.plain_text || "";
        markdown += `# ${text}\n\n`;
      } else if (block.type === "code") {
        const code = block.code.rich_text[0]?.plain_text || "";
        const lang = block.code.language;
        markdown += `\`\`\`${lang}\n${code}\n\`\`\`\n\n`;
      }
    }

    // 寫入檔案
    const outputPath = path.join("content", "posts", `${slug}.md`);
    fs.mkdirSync(path.dirname(outputPath), { recursive: true });
    fs.writeFileSync(outputPath, markdown, "utf-8");
    console.log(`✅ 生成: ${outputPath}`);
  }
}

generateSite().catch(console.error);
步驟 4:部署到 Vercel
# 安裝依賴
npm init -y
npm install @notionhq/client

# 設定環境變數
echo "NOTION_TOKEN=your-token" >> .env
echo "NOTION_DATABASE_ID=your-db-id" >> .env

# 生成內容
node generate-site.js

# 部署
npx vercel --prod
六、案例:基於 Notion API 的記帳本
Notion API 不僅可以做內容管理,還能搭建實用的記帳系統。
資料庫設計
| 欄位 | 類型 | 說明 |
|---|---|---|
| 金額 | Number | 消費金額 |
| 分類 | Select | 餐飲/交通/購物/娛樂 |
| 日期 | Date | 消費日期 |
| 備註 | Rich text | 消費說明 |
| 支付方式 | Select | 微信/支付寶/現金 |
Python 記帳腳本
# expense_tracker.py
from notion_client import Client
from datetime import datetime, timedelta

notion = Client(auth="your-token")
DATABASE_ID = "your-expense-db-id"

def add_expense(amount, category, note="", payment="微信"):
    """記錄一筆消費"""
    notion.pages.create(
        parent={"database_id": DATABASE_ID},
        properties={
            "金額": {"number": amount},
            "分類": {"select": {"name": category}},
            "日期": {"date": {"start": datetime.now().isoformat()}},
            "備註": {"rich_text": [{"text": {"content": note}}]},
            "支付方式": {"select": {"name": payment}}
        }
    )
    print(f"✅ 已記錄:{分類} - ¥{金額}")

def monthly_summary(year, month):
    """生成月度消費匯總"""
    start_date = f"{year}-{month:02d}-01"
    end_date = f"{year}-{month:02d}-28"  # 簡化處理

    results = notion.databases.query(
        database_id=DATABASE_ID,
        filter={
            "and": [
                {"timestamp": "created_time", "created_time": {"on_or_after": start_date}},
                {"timestamp": "created_time", "created_time": {"on_or_before": end_date}}
            ]
        }
    ).get("results")

    total = sum(r["properties"]["金額"]["number"] for r in results)
    by_category = {}
    for r in results:
        cat = r["properties"]["分類"]["select"]["name"]
        amount = r["properties"]["金額"]["number"]
        by_category[cat] = by_category.get(cat, 0) + amount

    print(f"\n📊 {year}年{month:02d}月消費匯總")
    print(f"總支出:¥{total:.2f}")
    print("-" * 30)
    for cat, amount in sorted(by_category.items(), key=lambda x: -x[1]):
        print(f"  {cat}:¥{amount:.2f}")

# 使用示例
add_expense(35.5, "餐飲", "午餐外送", "微信")
add_expense(128, "購物", "日用品", "支付寶")
monthly_summary(2026, 9)
配合 iOS 快捷指令
你可以將上述 Python 腳本部署為 Cloudflare Worker 或 Vercel Function,然後透過 iOS 快捷指令調用 API,實現手機端快速記帳。
七、與其他 AI 編程工具對比
| 工具 | 定位 | 優勢 | 劣勢 | 價格 |
|---|---|---|---|---|
| GitHub Copilot | AI 代碼補全 | 代碼生成品質高 | 不處理數據管理 | $10/月 |
| Cursor | AI 代碼編輯器 | 上下文理解強 | 需要訂閱 | $20/月 |
| Notion API + AI | 內容管理 + AI | 數據持久化、可視化 | 需要開發能力 | 免費起 |
| Obsidian + AI | 本地知識庫 | 隱私保護好 | 同步不便 | 免費起 |
核心差異:GitHub Copilot 和 Cursor 解決的是”寫代碼”的問題,而 Notion API 生態解決的是”管理內容”的問題。兩者不是替代關係,而是互補關係——你可以用 Copilot 寫 Notion API 的調用代碼,然後用這套代碼管理你的知識庫。
八、未來趨勢與學習資源
趨勢展望
- AI Agent + Notion:隨著 MCP 協議的普及,越來越多的 AI 助手將直接操作 Notion 工作區
- Notion AI 原生能力:Notion 自身的 AI 功能將持續增強,可能減少對第三方工具的依賴
- 低代碼化:NotionNext 等項目的演進方向是”零代碼”——未來可能連 Fork 倉庫都不需要
學習資源推薦
- Notion API 官方文檔 — 必讀,所有項目的起點
- notion-sdk-js 範例集 — 官方提供的程式碼範例
- react-notion-x Demo — 在線體驗渲染效果
- NotionNext 中文文檔 — 部落格系統部署指南
九、FAQ
Q1:Notion API 有調用頻率限制嗎?
有。Notion API 的限制是平均每秒 3 次請求(按工作區計算)。對於個人博客或知識庫來說完全夠用,但如果要做大規模資料同步,需要實現請求隊列和退避策略。
Q2:這些開源項目需要付費嗎?
所有提到的開源項目本身都是免費的。但使用 Notion API 需要 Notion 帳號——個人版免費,團隊版按人頭收費。API 調用額度與你的訂閱等級掛鉤。
Q3:NotionNext 和 notionpresso 有什麼區別?
NotionNext 是一個完整的”部落格系統”——它直接部署為網站,用戶訪問的是 NotionNext 生成的頁面。notionpresso 是一個”內容導出工具”——它將 Notion 內容轉為 Markdown,交給其他靜態站點生成器(如 Astro、Hugo)處理。選擇取決於你是否想要 NotionNext 提供的現成主題和功能。
Q4:如何用 AI 輔助開發 Notion API 項目?
推薦工作流:用 Cursor 或 GitHub Copilot 編寫 API 調用代碼 → 用 Notion MCP Server 讓 AI 直接讀取需求文檔 → 用 react-notion-x 渲染 AI 生成的內容。這套組合拳可以大幅提升開發效率。
Q5:資料安全性如何保障?
Notion API 使用 OAuth 2.0 認證,所有請求走 HTTPS。敏感資料(如 API Token)應存儲在環境變數中,不要提交到程式碼倉庫。對於高安全需求場景,可以考慮自託管 Notion 替代品(如 AppFlowy、AFFiNE)。
希望這篇深度評測能幫你找到適合自己的 Notion API 開源工具。無論你是想搭建個人部落格、構建知識庫,還是開發記帳系統,Notion API 生態都能提供成熟的解決方案。
如果你有任何問題或想分享你的 Notion API 項目,歡迎在評論區留言!